Sitting in the room at DockerCon Austin 3 years ago to the day, the LinuxKit project was introduced to the world. LinuxKit is an easy-to-use tool for building custom, immutable Linux distributions optimized for container-based workloads and security.
While the project does provide a great starting document for deploying LinuxKit VMs on Azure, I wanted to use newer Azure platform featuers such as Managed Disks as part of the deployment.
Today, let’s first use LinuxKit to create a custom Linux operating system, upload to an Azure Managed Disk, create a VM using that disk, and then run an Nginx container for the world to see. While declarative Azure Resource Manager (ARM) templates are typically preferred, using imperative CLI commands will make it easier to coordinate with other CLI-based tools needed for these tasks.
Prerequisites
- Azure CLI
- AzCopy Utility
- LinuxKit
- jq
- OSX or WSL2 envvironment for *nix commands
Log into Azure CLI
az login
Download AzCopy utility
curl \
  --location \
  --output azcopy.tar.gz \
  --url https://aka.ms/downloadazcopy-v10-linux

tar -xzf azcopy.tar.gz --strip-components=1 \
&& rm ThirdPartyNotice.txt

./azcopy help
Install LinuxKit
# WSL2/Ubuntu with golang installed
go get -u github.com/linuxkit/linuxkit/src/cmd/linuxkit
alias linuxkit=~/go/bin/linuxkit

# OSX w/HomeBrew
brew tap linuxkit/linuxkit
brew install --HEAD linuxkit

# Test installation
linuxkit -h
Install jq
# WSL2/Ubuntu
sudo apt-get install jq

# OSX
brew install jq
Steps
1. Set Environment Variables
Defining a few environment variables is going to make our lives far easier when using the Azure CLI:
AZ_RG='follis-linuxkit' # Azure Resource Group name
AZ_LOCATION='eastus2'   # Azure datacenter location name
AZ_VM='follislinuxkit'  # Azure VM name
2. Create custom configuration file
The LinuxKit repository includes two sample configuration files, azure.yml and docker.yml, that we can use as a starting point. Combining both together into a single azure-docker.yml file, I took the liberty of bumping the docker engine version to the most recent available: docker:19.03.8-dind.
kernel:
  image: linuxkit/kernel:5.4.30
  cmdline: "console=ttyS0"
init:
  - linuxkit/init:a0246dd478a24abbee0a4cede99662ffc4931691
  - linuxkit/runc:69b4a35eaa22eba4990ee52cccc8f48f6c08ed03
  - linuxkit/containerd:09553963ed9da626c25cf8acdf6d62ec37645412
  - linuxkit/ca-certificates:v0.7
onboot:
  - name: sysctl
    image: linuxkit/sysctl:v0.7
  - name: sysfs
    image: linuxkit/sysfs:v0.7
  - name: format
    image: linuxkit/format:65b9e0a76d0b9fb8ac5c5f3bc8d3131109290f56
  - name: mount
    image: linuxkit/mount:v0.7
    command: ["/usr/bin/mountie", "/var/lib/docker"]
services:
  - name: getty
    image: linuxkit/getty:v0.7
    env:
     - INSECURE=true
  - name: rngd
    image: linuxkit/rngd:02c555b50cd1887aa628836662d2eec54c0d7e81
  - name: dhcpcd
    image: linuxkit/dhcpcd:v0.7
  - name: ntpd
    image: linuxkit/openntpd:v0.7
  - name: docker
    # image: docker:18.06.0-ce-dind
    image: docker:19.03.8-dind
    capabilities:
     - all
    net: host
    mounts:
     - type: cgroup
       options: ["rw","nosuid","noexec","nodev","relatime"]
    binds:
     - /etc/resolv.conf:/etc/resolv.conf
     - /var/lib/docker:/var/lib/docker
     - /lib/modules:/lib/modules
     - /etc/docker/daemon.json:/etc/docker/daemon.json
    command: ["/usr/local/bin/docker-init", "/usr/local/bin/dockerd"]
  - name: sshd
    image: linuxkit/sshd:v0.7
files:
  - path: var/lib/docker
    directory: true
  - path: etc/docker/daemon.json
    contents: '{"debug": true}'
  - path: root/.ssh/authorized_keys
    source: ~/.ssh/id_rsa.pub
    mode: "0600"
    optional: true
trust:
  org:
    - linuxkit
    - library
3. Build the custom OS
Using the LinuxKit binary we need just a single command to generate a VHD file.
linuxkit build -format vhd azure-docker.yml
4. Create an Azure Resource Group
A Resource Group is needed to encapsulate all resources that we will be provisioning.
az group create \
  --location "${AZ_LOCATION}" \
  --name "${AZ_RG}" \
  --tag owner="$(whoami)" # Optional but a good practice to set an owner tag
To cleanup afterwards, simply delete the Resource Group to remove all resources
5. Create an empty managed disk
Azure Managed Disks are the preferred way to work with OS images. They provide better durability and peformance, improved support for VM Scale Sets, and a variety of other features beyond the traditional method of placing VHDs inside of an Azure Storage Account blob store.
When creating the disk we need to set a size. This can be retrieved with the wc -c azure.vhd command.
az disk create \
  --for-upload \
  --location "${AZ_LOCATION}" \
  --name "${AZ_VM}" \
  --resource-group "${AZ_RG}" \
  --sku Standard_LRS \
  --upload-size-bytes $(wc -c azure-docker.vhd | cut -d' ' -f 1)
6. Generate a temporary SAS token to write to the data disk
Managed Disks are locked down by default for security, but we can generate and store as a variable a Shared Access Signature (SAS) to programmatically interact with the resource.
SAS=$(az disk grant-access \
  --name "${AZ_VM}" \
  --resource-group "${AZ_RG}" \
  --access-level Write \
  --duration-in-seconds 86400 \
  --output tsv)
7. Upload VHD to Managed Disk via AzCopy utility
AzCopy is a handy utlity for uploading large files into Azure rather than relying on raw REST endpoint. We can use it to upload the custom VHD to the Azure Managed Disk, while using with the SAS for security.
./azcopy copy \
  azure-docker.vhd \
  "${SAS}" \
  --blob-type PageBlob
8. Revoke SAS
Once the VHD is uploaded, we should tidy up by revoking the SAS rather than relying on its duration to time out.
az disk revoke-access \
  --name "${AZ_VM}" \
  --resource-group "${AZ_RG}"
9. Create Virtual Machine from custom VHD
Normally we should use an ARM Template to create a VM and its associated resources, but for simplicity we will rely on the CLI to provide the associated virtual network, virtual network interface, network security group, and public IP objects.
az vm create \
  --attach-os-disk "${AZ_VM}" \
  --location "${AZ_LOCATION}" \
  --name "${AZ_VM}" \
  --os-type linux \
  --resource-group "${AZ_RG}"
By default the Network Security Group (NSG) opens port 22 for SSH. To prepare for a web application let us go ahead and also open port 80.
az vm open-port \
  --name "${AZ_VM}" \
  --port 80 \
  --resource-group "${AZ_RG}"
10. Acces the Virtual Machine
Since the azure-docker.yml include the sshd service we can access the virtual machine over standard SSH.
AZ_VM_IP=$(az vm list-ip-addresses \
  --name "${AZ_VM}" \
  --resource-group "${AZ_RG}" \
  --output json \
  | jq --raw-output '.[0].virtualMachine.network.publicIpAddresses[0].ipAddress')

ssh root@"${AZ_VM_IP}"
Once in the VM, we see that all services are running as services within containerd namespaces. To see all namespaces and then all services within a namespace we use the ctr CLI.
# List all containerd namespaces
ctr ns ls

# List all containers within the specified namespace
ctr --namespace services.linuxkit containers ls

# Exec to the Docker service
ctr --namespace services.linuxkit tasks exec --tty --exec-id sh docker /bin/ash -l
Confirming that the Docker Engine was setup properly, and deploying an Nginx container is done with standard Docker CLI commands.
# Confirm Docker Engine version
docker version

# Create a container bound to port 80
docker container run \
  --detach=true \
  --publish 80:80 \
  --name nginx \
  nginx:alpine

# Exit the SSH session back to your original terminal
exit
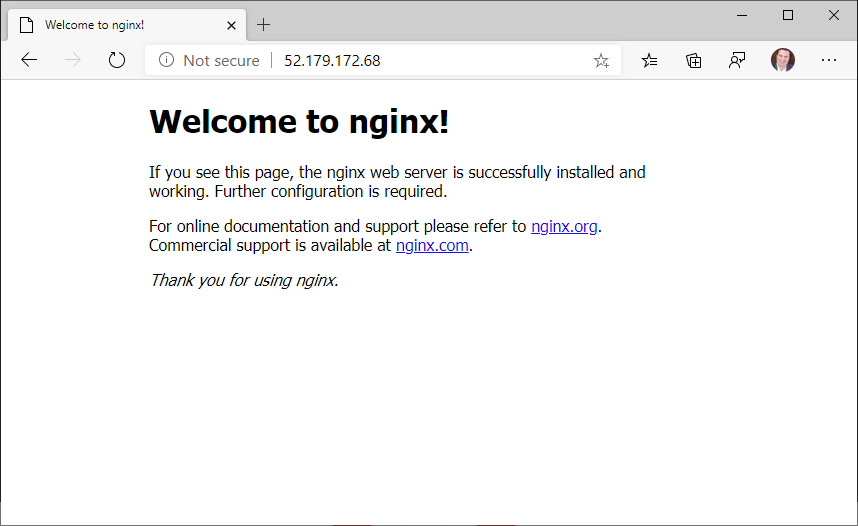
11. Browse to Nginx
Once the container is running with Nginx we can browse to it using the virtual machine’s public IP address.
# Echo out the public IP (back on your host - not the VM)
echo "${AZ_VM_IP}"

# Copy/paste IP address into a browser
Wrap Up
Historically I thought only massive companies such as Canonical or RedHat were capable of building out a Linux distribution, but the LinuxKit tool drastically lowers that barrier to entry. Using such a minimal OS promotes security by removing a multitude of OS packages that are superfluous for containerized workloads. The configuration YAML also functions as an infrastructuer as code artifact, easily checked into source control for versioning and recreation whenever needed.
Hopefully this has been an end-to-end look at how LinuxKit can power your Azure Virtual Machines.
Thanks!