Web Matrix is a code editor that has been around for a very long time and will [sadly] reach end of life on November 1, 2017. In honor of this sad day, I wanted to take one of Web Matrix’s starter applications, and generate a Docker File for it.
Why? The sample applications within Web Matrix are old. These 5+ year old web applications pre-date modern MVC patterns and technology, but are representative of legacy applications that enterprises struggle to maintain today. By moving a legacy application into a Docker container, we can move the application to run on a modern infrastructure (Server 2016, Azure, etc.), make deployments far easier via a CI/CD pipeline, and decrease the inherent attack surface.
![]()
Pre-Requisites
- Docker for Windows
- Visual Studio 2017 Community Edition (or similar)
- SQL Server Express (or better) running locally
Install Web Matrix
Web Matrix 3.0 can be installed via the Web Platform Installer.
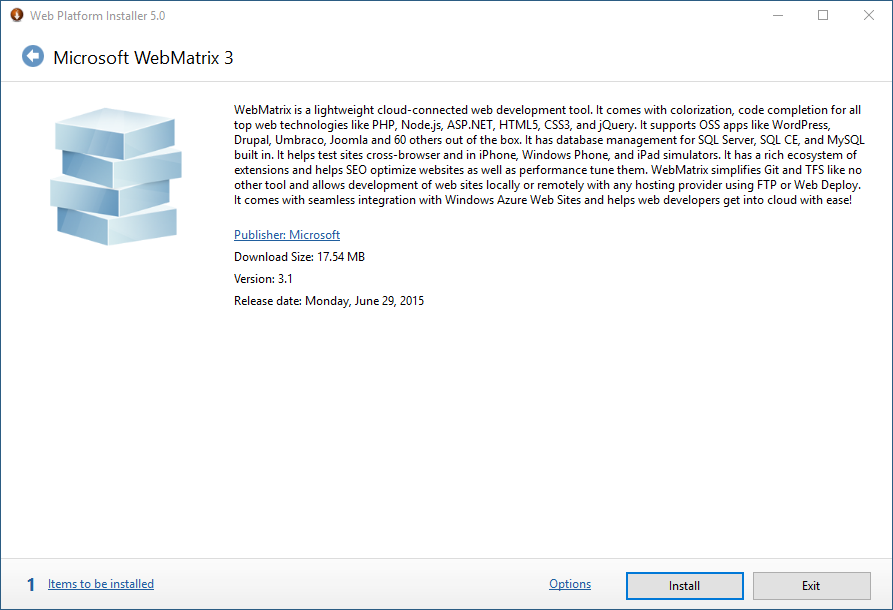
Download the WP installer and run the setup program. Any dependencies needed will be automatically downloaded as part of the process (nifty!).
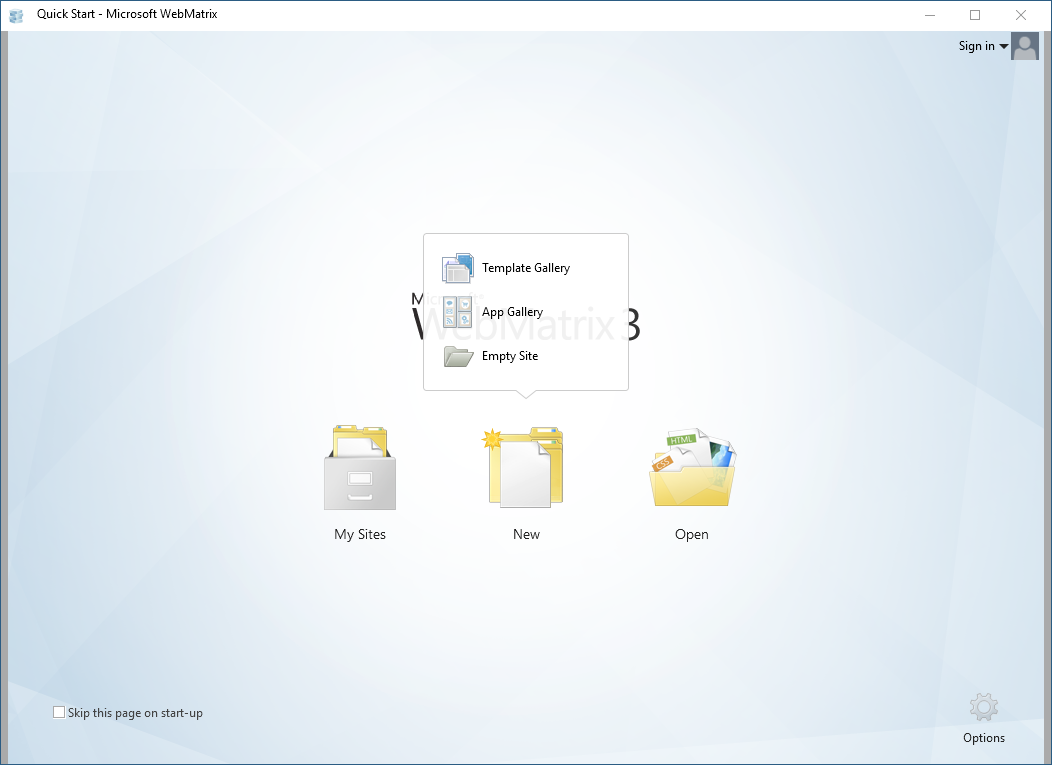
After installing, start the Web Matrix application.
Part 1: The Web Application
Create a sample Bakery application
When Web Matrix is first started, you are greeted with a few options. For our purposes today, select New and Template Gallery.
The Template Gallery contains several options. Select the Bakery template tile, and name the site Bakery.
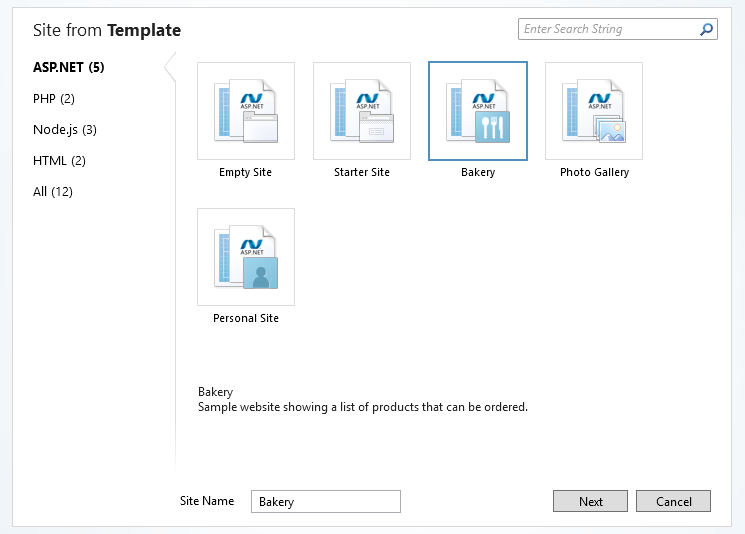
Feel free to try this same exercise with the Photo Gallery or Personal Site templates
Once selected, Web Matrix will download the source files for the application from the internet and pull down any dependencies.
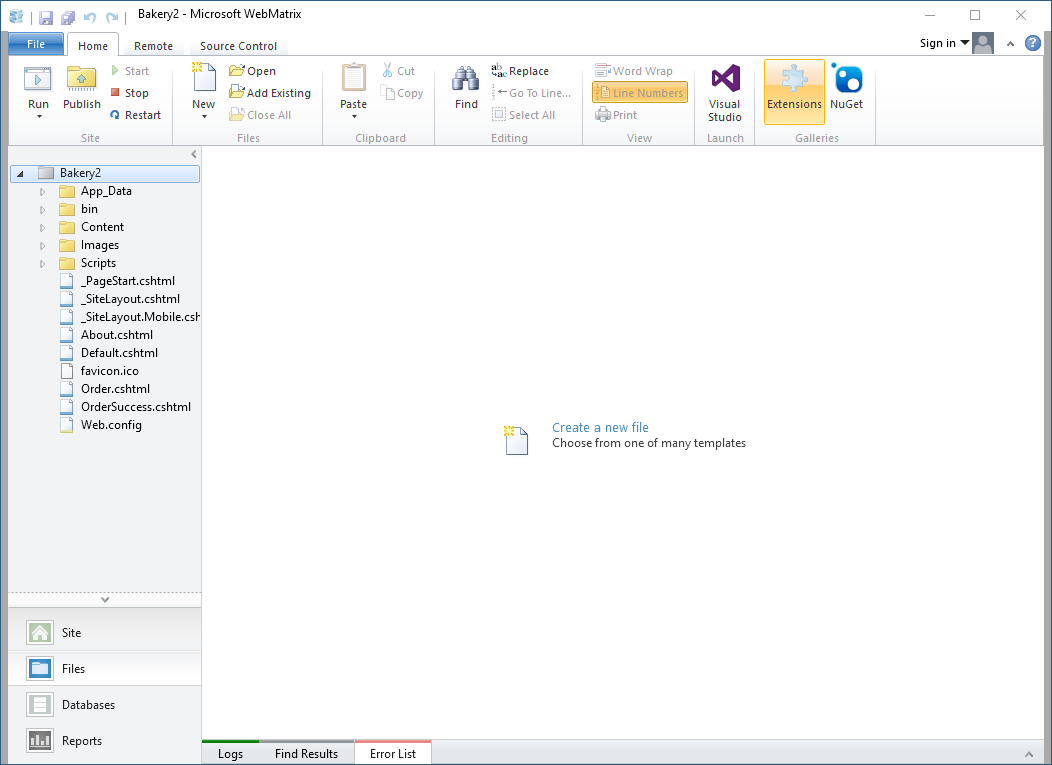
Once the solution is visible, click Run from the top left corner of the ribbon to launch the application in a browser.
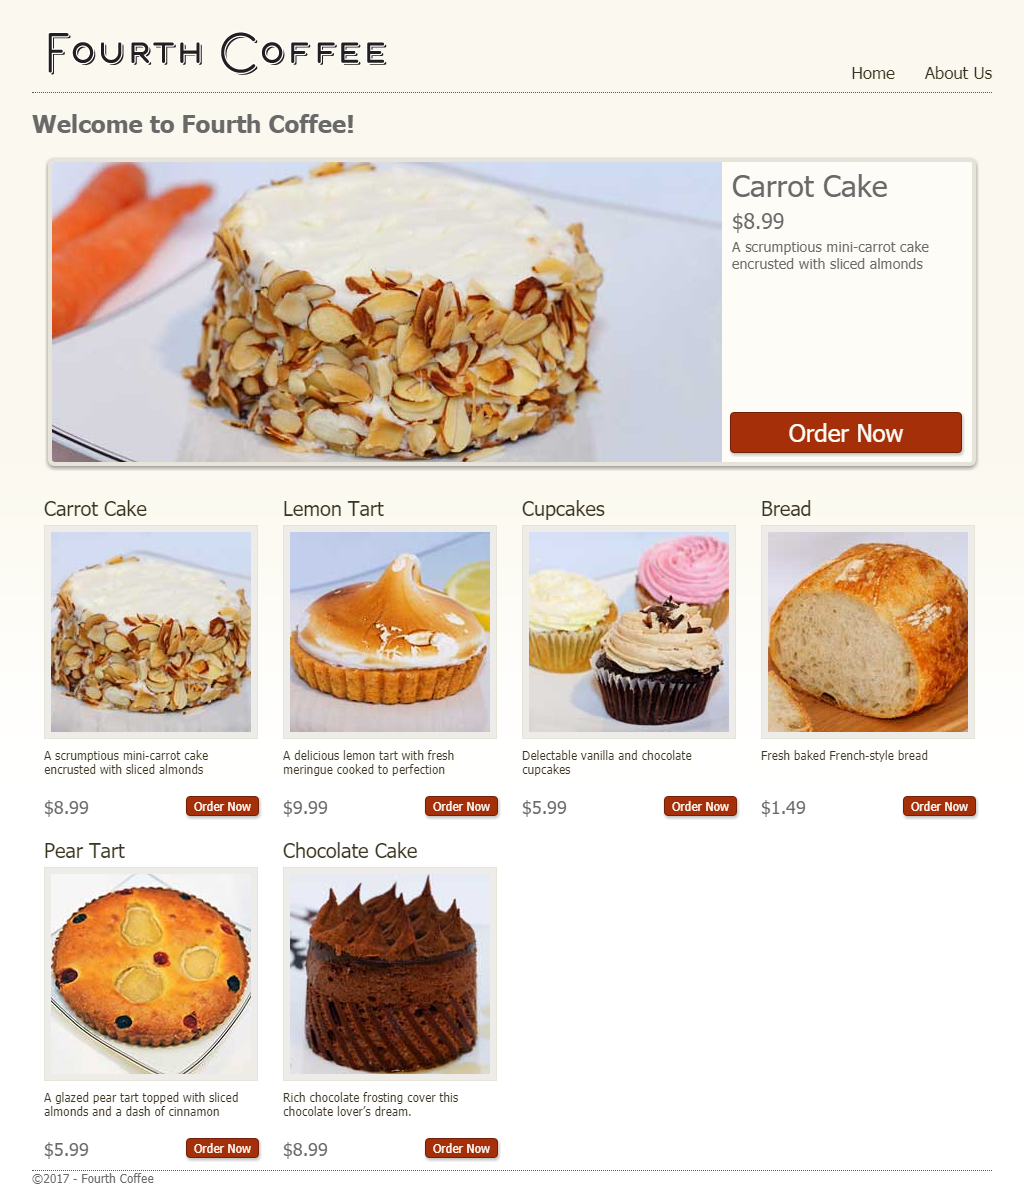
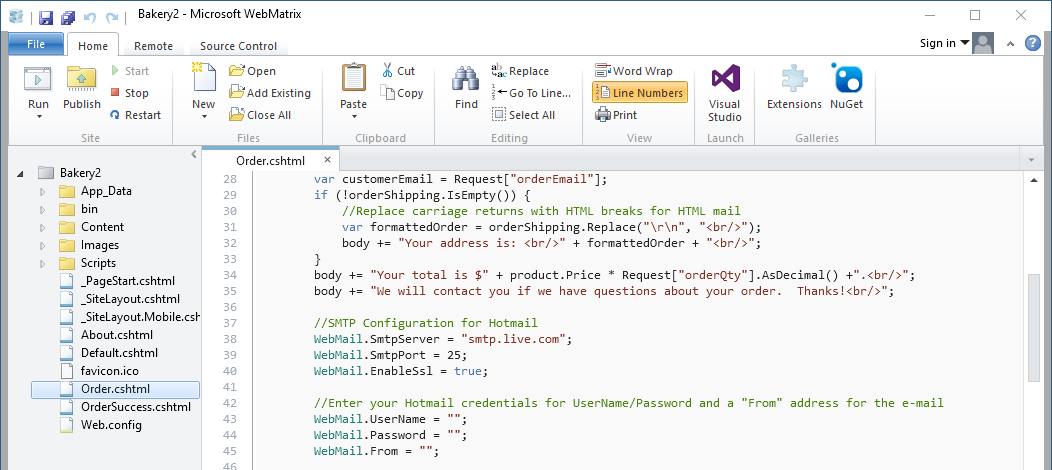
Meet the Fourth Coffee application. This ASP.NET Web Forms e-commerce application shows a menu option of several delectable treats, shows a detailed view for each, and allows the user to place an order. Remember when I said this application was old? Order receipts are setup to use Hotmail, which was retired back in 2012 for Outlook.com. Check out Order.cshtml:
With the application generated and running, let’s setup a Visual Studio solution for easier management.
Application files should be located at
C:\Users\<your username>\Documents\My Web Sites
Configure the application for Visual Studio
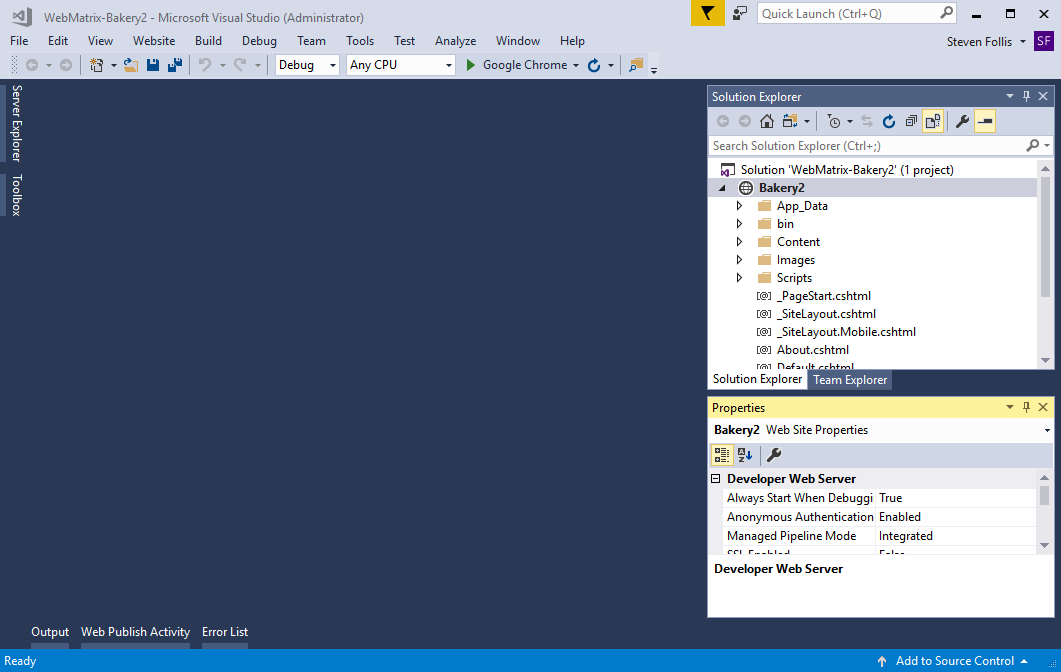
Web Matrix includes a nifty feature to auto-generate a Visual Studio solution from our code, making it easier to manage our Bakery application in a modern (and supported) IDE. In Web Matrix, click Visual Studio from the ribbon bar.
I have Visual Studio 2017 Community edition installed, but any recent-ish version of VS should work.

Visual Studio then opens, with a VS Solution and Project generated with our code. Hit F5 to enter debug mode, and you should see the same web application in the browser as before.
In File Explorer, we have a bit of a mismatch. Our original files are located at C:\Users\<your username>\Documents\My Web Sites, but our VS Solution is located at C:\Users\<your username>\Documents\WebMatrix Solutions\Projects. Plus, the project generated by VS wasn’t a formal Web Application project, which will impact how easily we can take advtange of tooling in a later step.
Instead of relying on this autogenerated VS Solution, let’s backup and create our own new solution and copy over the files. This will ensure we have all solution files in a single folder on our hardrive, and make it easier to manage the web application going forward.
Close the open Solution in Visual Studio by selecting File -> Close. Then select File -> New Project, naming the Solution Bakery and selecting the ASP.NET Empty Web Application template from the Installed Visual C# web templates.

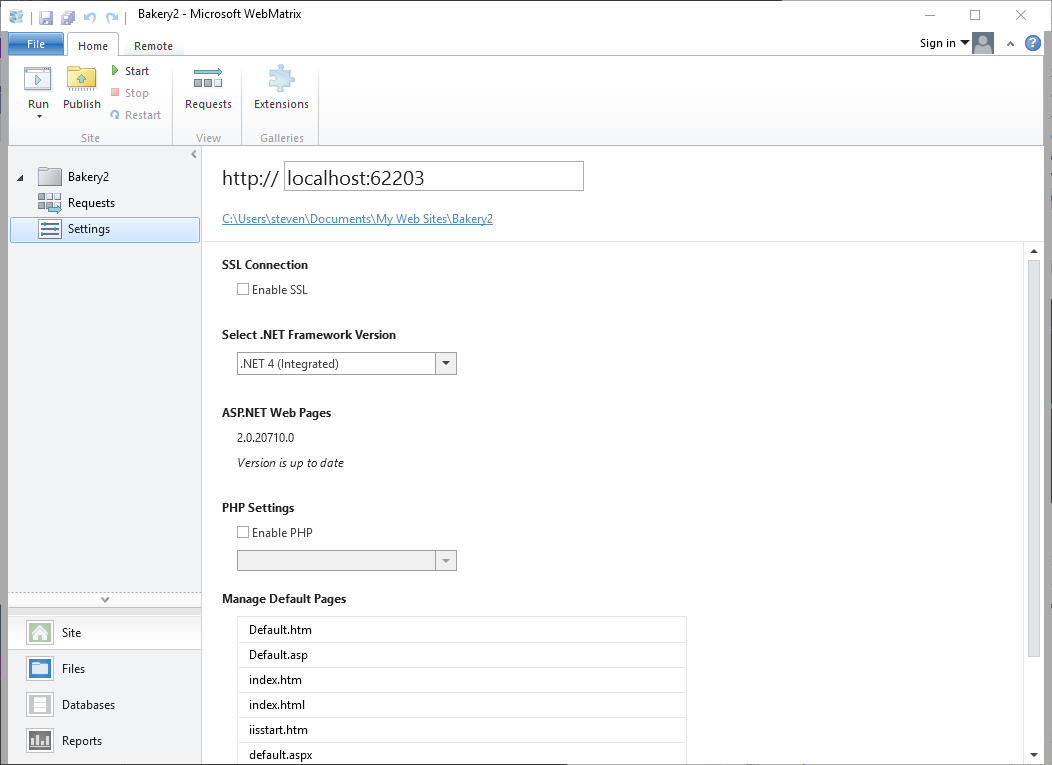
Be sure to also select .NET Framework 4 from the New Project’s dropdown. This was found from the left-hand navigation bar of Site –> Settings –> Select .NET Version to see that it is configured to use .NET 4.
Once Visual Studio scaffolds out our Solution and Project, delete web.config since we have one already created. Then, to import the entirety of our application files, open the Project in Windows Explorer and copy over all of the files from the WebMatrix folder. In my case that meant opening C:\Users\steven\Documents\visual studio 2017\Projects\Bakery\WebApplication and pasting in all files from C:\Users\steven\Documents\My Web Sites\Bakery.
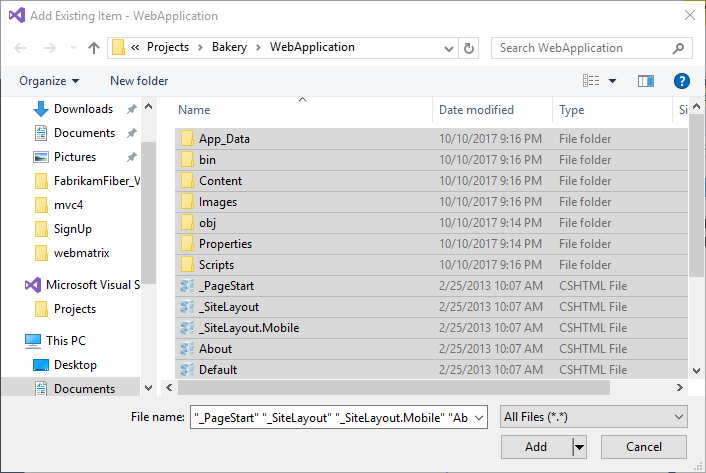
Once copied into the same directory, we need to let Visual Studio know the files are there. Right click the VS Project and select Add -> Existing Item
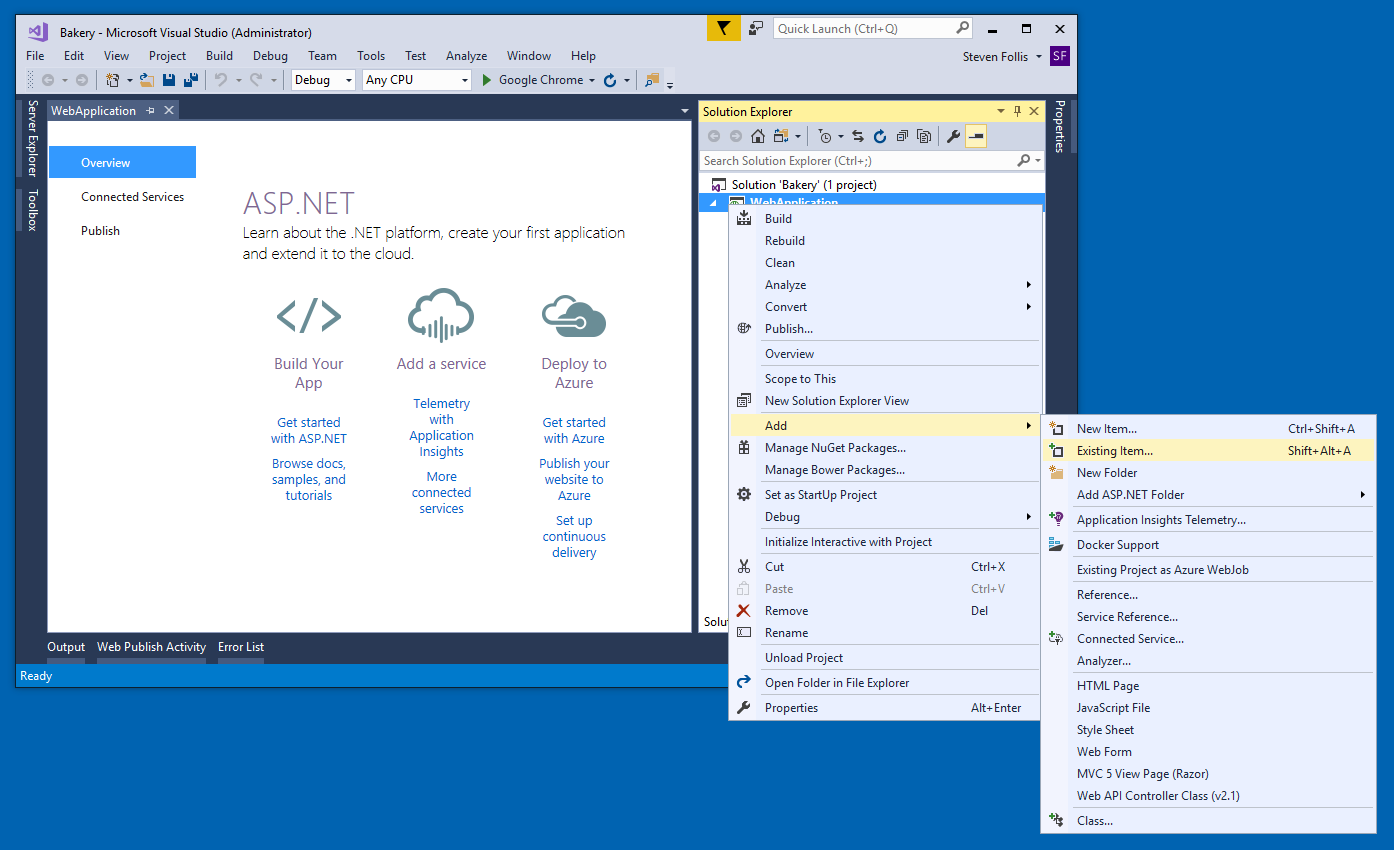
Then select all items in your Project’s folder (except for the existing .csproj Project FIle) and select Add.
Now in Visual Studio, all files are present. Hit F5 to again ensure that the Web Application loads as expected in a browser window.
That bit of roundabout VS kung-fu will make our lives easier over the longterm, and reflects the evolution of the VS tooling over the past decade. With our application all setup in a VS Solution, let’s get to Dockerizing!
Docker-ize the Application
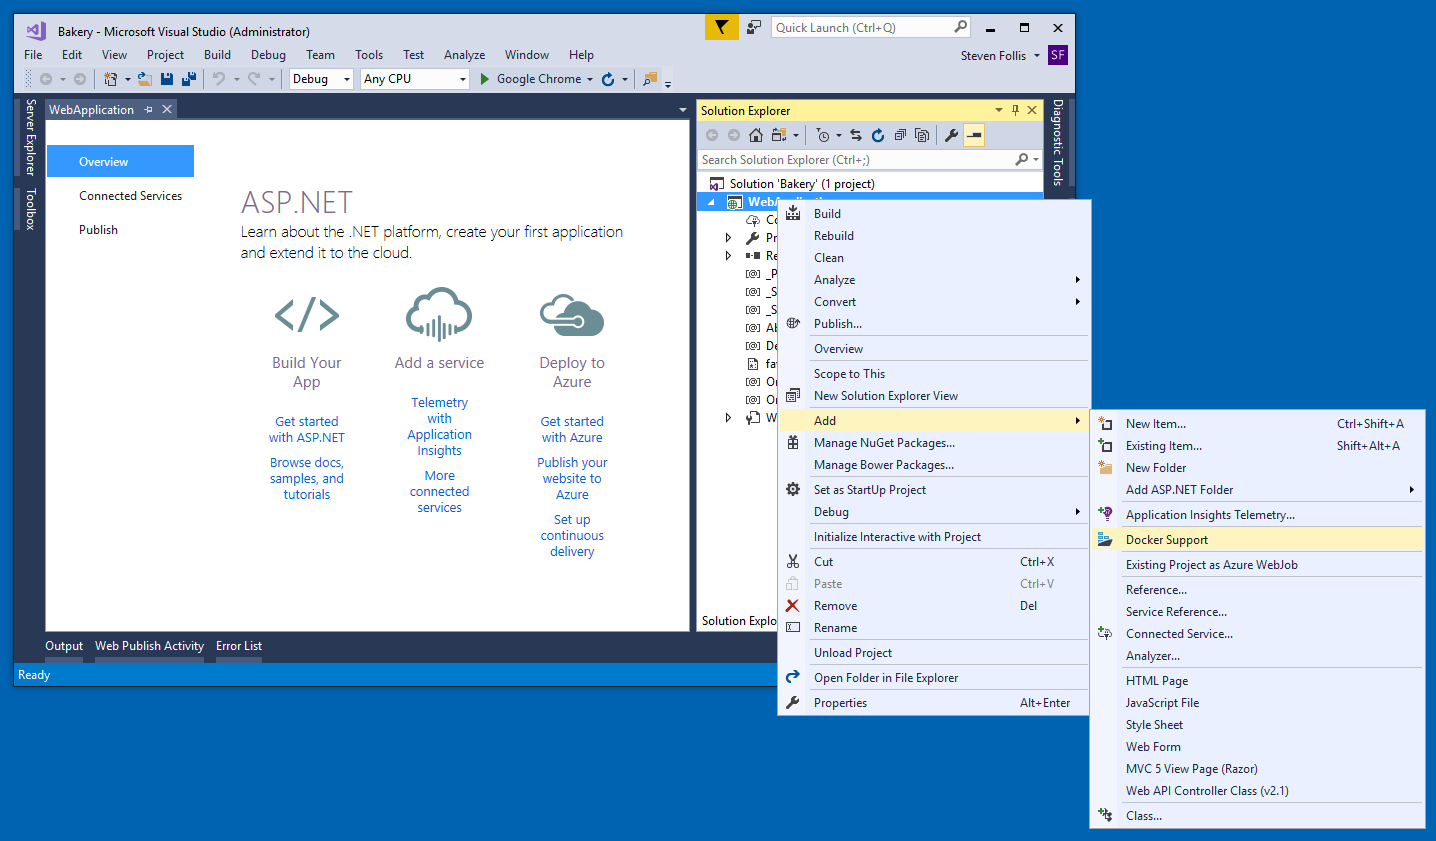
Now comes the fun part! To wrap our application in a container, we need to first create a Dockerfile. We could create one manually, but since we are using Visual Studio we can take advantage of the Visual Studio tools for Docker. Right-click on the WebApplication project, select Add, and click Docker Support.
The VS Tools for Docker automatically generate a Dockerfile and series of docker-compose files for us, based on characterisitcs of our application. Notice the green debugging arrow now says “Docker”, as the tooling will now launch our application inside of a Docker container, with a debugger attached. Normally this works flawlessly, however if you hit F5 to launch a new debugging session you’ll likely meet this lovely screen:
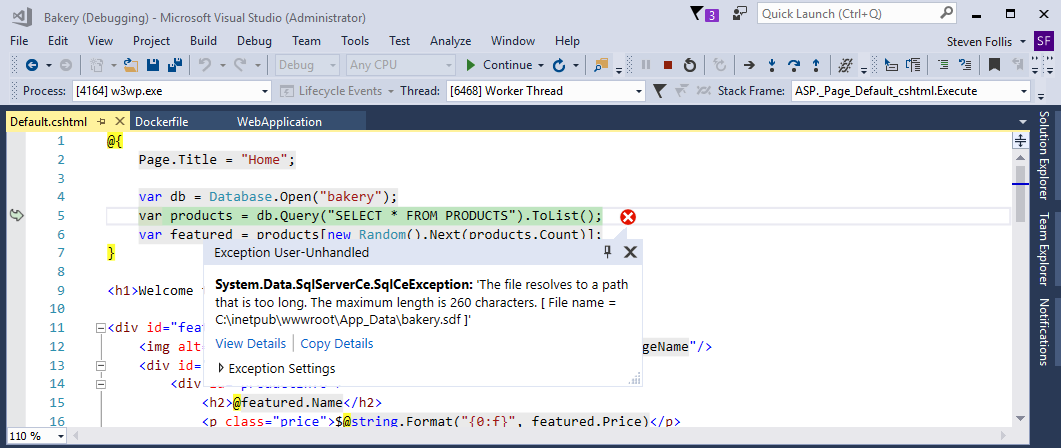
With an error saying:
System.Data.SqlServerCe.SqlCeException occurred
  HResult=0x80004005
  Message=The file resolves to a path that is too long. The maximum length is 260 characters. [ File name = C:\inetpub\wwwroot\App_Data\bakery.sdf ]
  Source=SQL Server Compact ADO.NET Data Provider
  StackTrace:
<Cannot evaluate the exception stack trace>
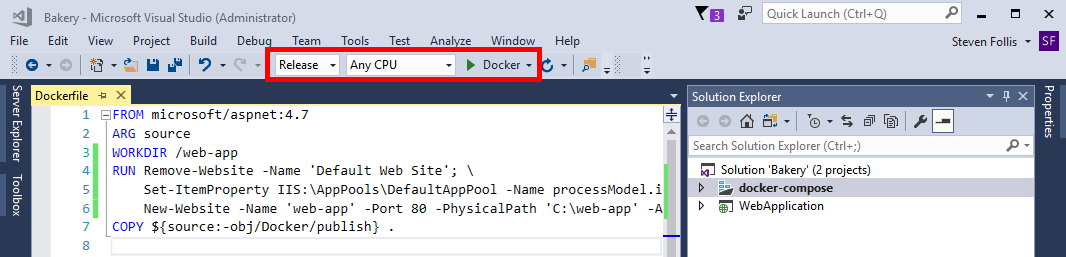
“The file resolves to a path that is too long” was a new error for me, and one that I never completely tracked down online. I did, with Elton Stoneman’s help (his new book is terrific, btw #shamelessplug) find a workaround. Creating a new Web Site with an updated AppPool Identity Type, we can get past the error that I suspect is related to file permissions. To make these edits, we will adjust our Dockerfile.
Open the Dockerfile that was auto-generated for us by the VS Tools for Docker:
FROM microsoft/aspnet:4.7
ARG source
WORKDIR /inetpub/wwwroot
COPY ${source:-obj/Docker/publish} .
Update the Dockerfile with a new RUN statement and a fresh, non-IIS default working directory:
FROM microsoft/aspnet:4.7
ARG source
WORKDIR /web-app
RUN Remove-Website -Name 'Default Web Site'; \
    Set-ItemProperty IIS:\AppPools\DefaultAppPool -Name processModel.identityType -Value LocalSystem; \
    New-Website -Name 'web-app' -Port 80 -PhysicalPath 'C:\web-app' -ApplicationPool 'DefaultAppPool'
COPY ${source:-obj/Docker/publish} .
To avoid any insertion of the tooling’s debugging system, switch the Configuration to Release, and hit CTRL-F5 to “start the application without debugging”. The VS Tools for Docker look to be injecting debugging functionality when the container starts, which conflicts with the aspnet image’s entrypoint.
Visual Studio will start the application without debugging, and soon in our browser we can see the Bakery application running now on our local host, but in a Windows Container via Docker:
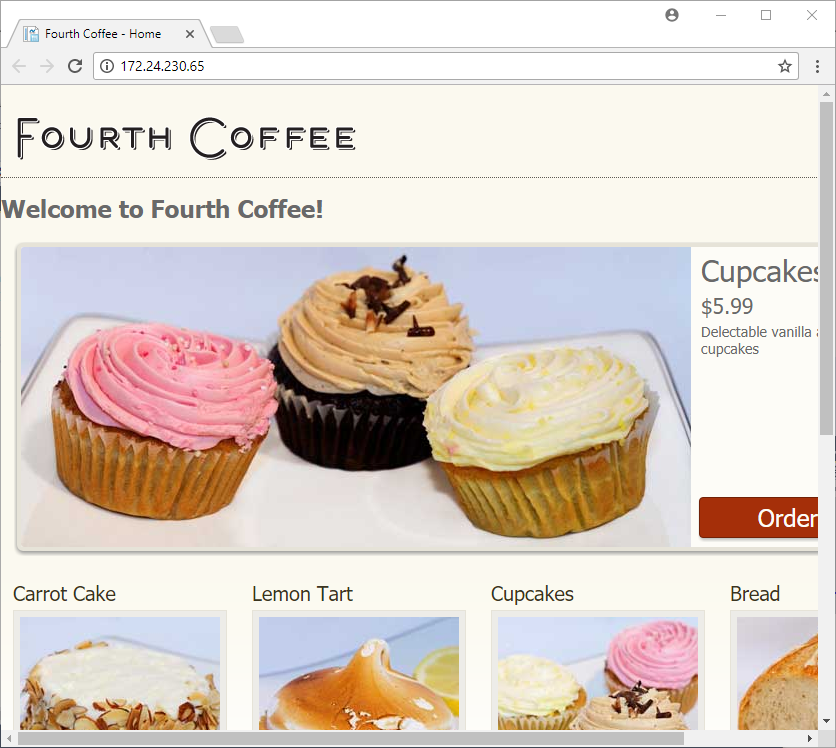
Note the IP address, which we could also get by running the following from a PowerShell window on the host for the specific container:
docker inspect -f "{{ .NetworkSettings.Networks.nat.IPAddress }}" <your container name>
There is likely a more elegant and plain better method for getting past the error experienced earlier, thus regaining the ability to use debugging directly in VS. The Visual Studio Tools for Docker setup a terrific pipeline of functionality, but somehow negatively impacted the permissions of the Bakery application.
Part 2: The Database
Externalize the database
The Bakery appplication is using Microsoft SQL Server Compact (SQL CE), a lightweight RDBMS used for mobile applications and embedded systems (and Web Matrix demo applications, apparently). Since CE was deprecated 4.5+ years ago, the next step I wanted to take with Bakery was to move the database from a single .sdf file into a full fledged Microsoft SQL Server Developer Edition database. Microsoft publishes an official image on Docker Hub, but first we need to get our existing product catalog migrated.
Opening SQL Server Management Studio 17, I had expected to be able to migrate my .sdf database to a format that would work with SQL Server (or at last generate a .sql file that could reproduce the data). No-go. Turns out the support for SQL CE within SSMS studio was deprecated in SSMS 2008. Isn’t legacy fun? Fortunately, Web Matrix has a feature where an SQL CE file can be exported into a SQL Server Express instance.
There are numerous 3rd party tools for getting data out of a SQL CE file if Web Matrix isn’t an option (or just download SSMS 2008)
Opening Web Matrix and navigating to Databases from the left navigation, select bakery.sdf and on the ribbon select Migrate
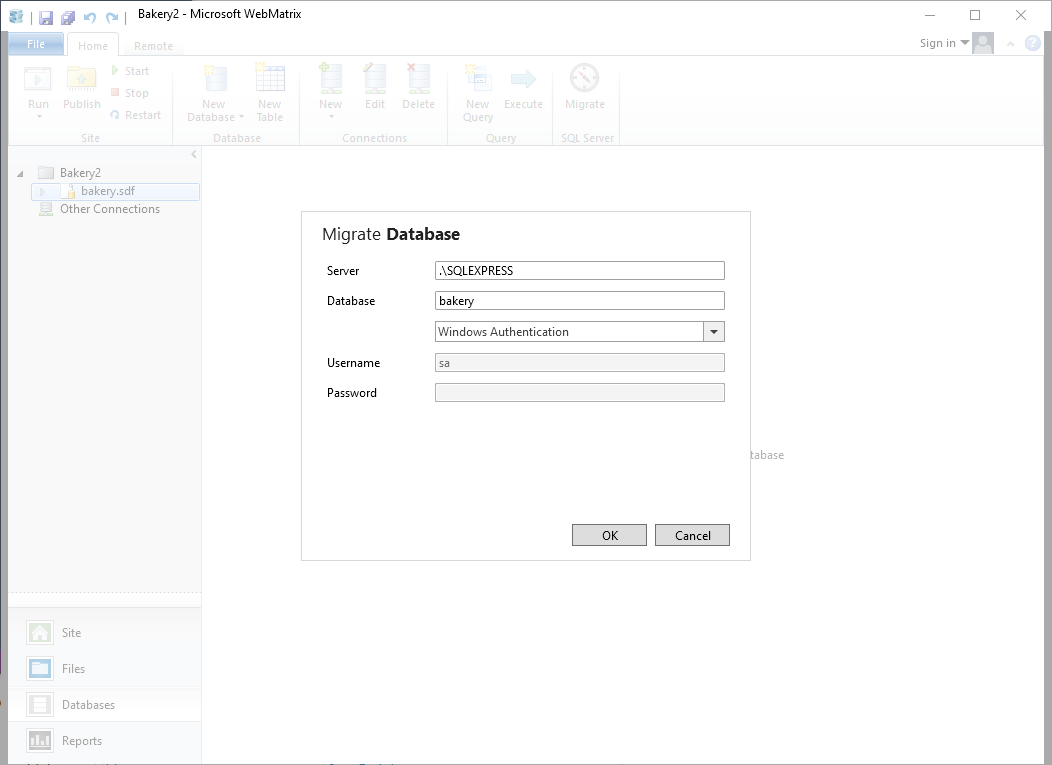
Note: you need SQL Server installed locally for this to work. Express works fine (is what I used)
Adjust Web Matrix’s connection box to use your database credentials. My local SQL Server Express instance uses Windows authentication. Once settings are adjusted, click OK and Web Matrix will automatically migrate the data.

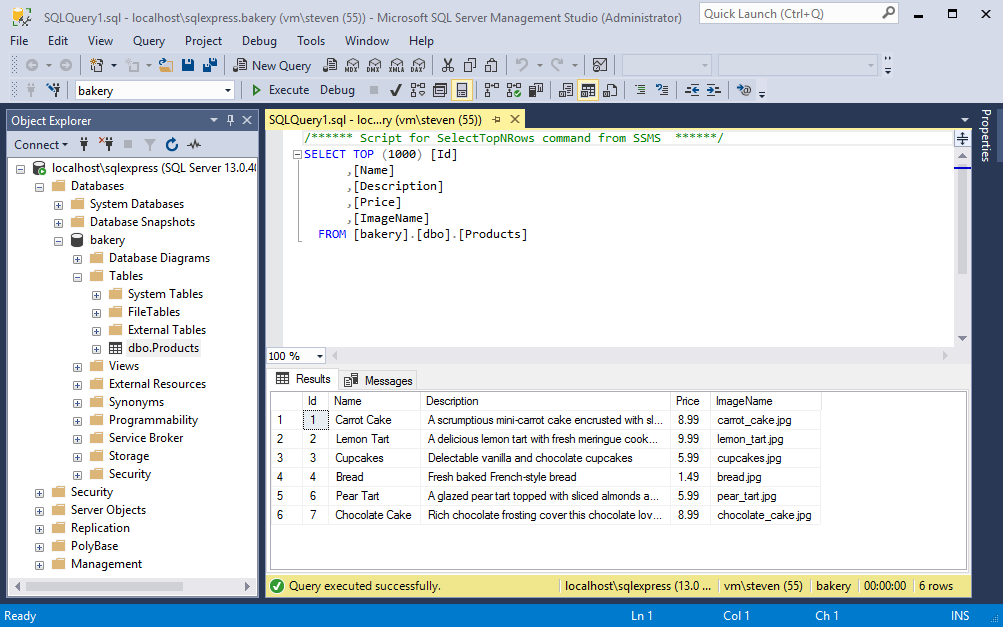
Connecting to the local SQL Server instance via SQL Server Management Studio, I can see a new “bakery” database has been created and all of the data is present.
Create a SQL Project
We have now freed our data from the deprecated world of SQL CE, but how will we get it into a container running SQL Server? For this we’ll setup a SQL Project in Visual Studio, which will help us manage future schema updates in a familiar dev environment and facilitate checkins to a source control system.
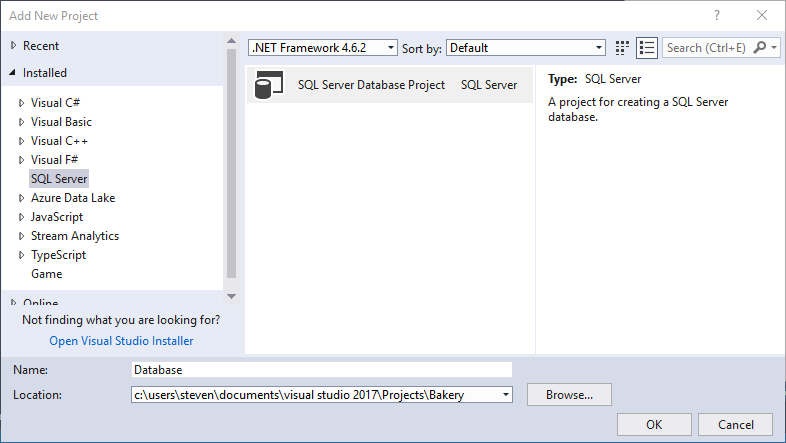
To create the project, right click on the Visual Studio solution, hover on Add and select New Project
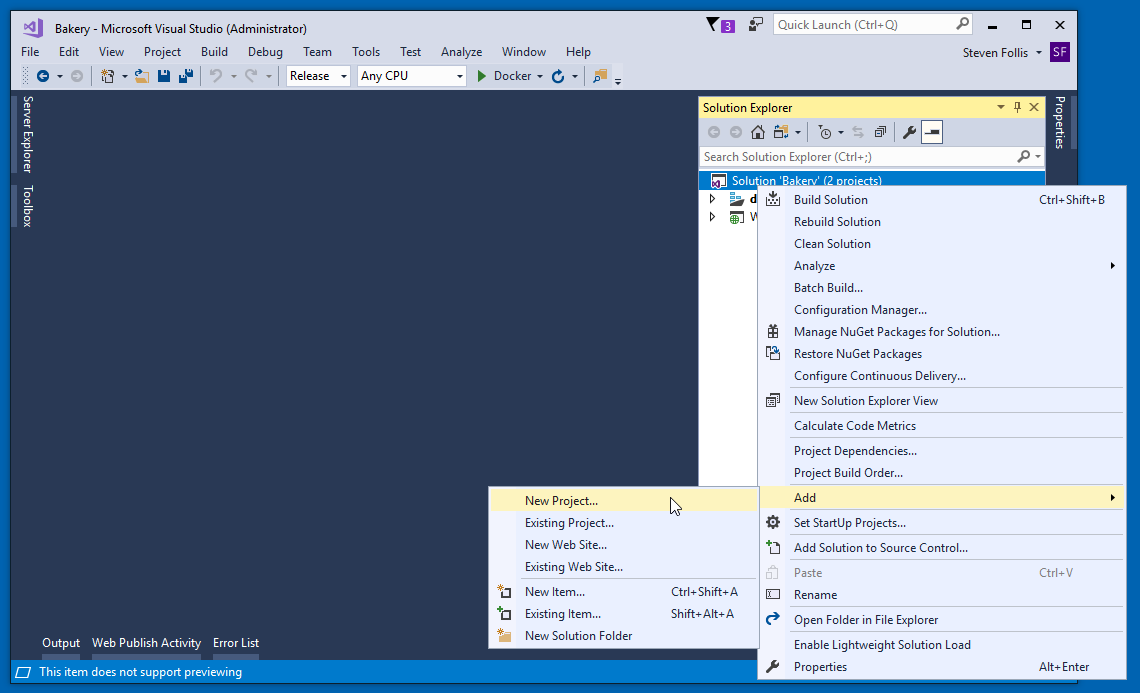
Select SQL Server from the left-hand navigation pane, bumping the .NET Framework dropdown back up to a modern 4.6.2. Select the SQL Server Database Project template, and name the project Database. Click OK to scaffold out the project.
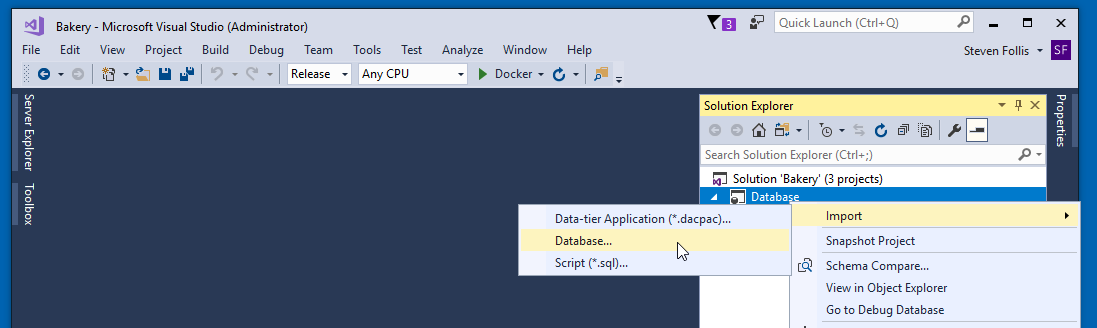
Once the project has been created, we need to populate it with schema data. In an earlier step we exported the database data to a local instance of MS SQL Server Express. We can import the data from that local instance into Visual Studio by right clicking the Database project, selecting Import and clicking on Database.
In the Import Database wizard, we need to configure a connection the local SQL instance. Click Select Connection and configure Server Name to match your local instance. Depending on how you setup SQL, configure Windows or SQL Authentication. Finally, select the bakery database (the DB name that was setup earlier in the SQL instance) and click Connect.
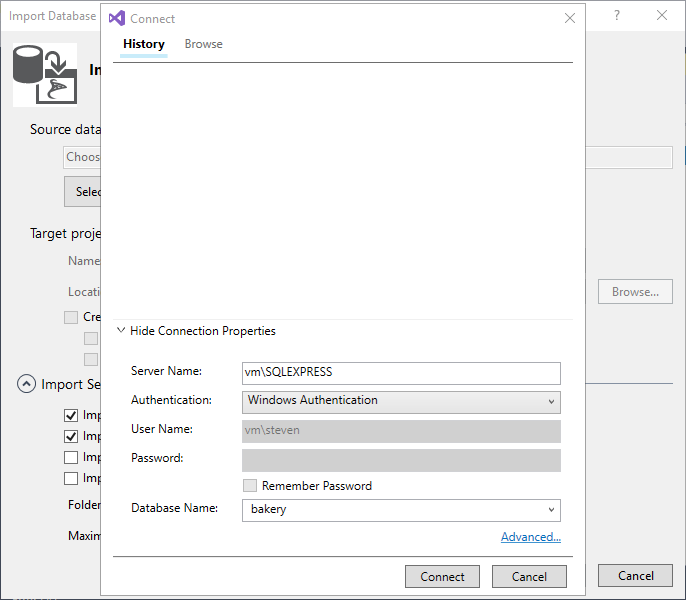
Back on the Import Database wizard, click Start to begin the import process and watch the Summary screen complete. Click Finish to close the wizard.
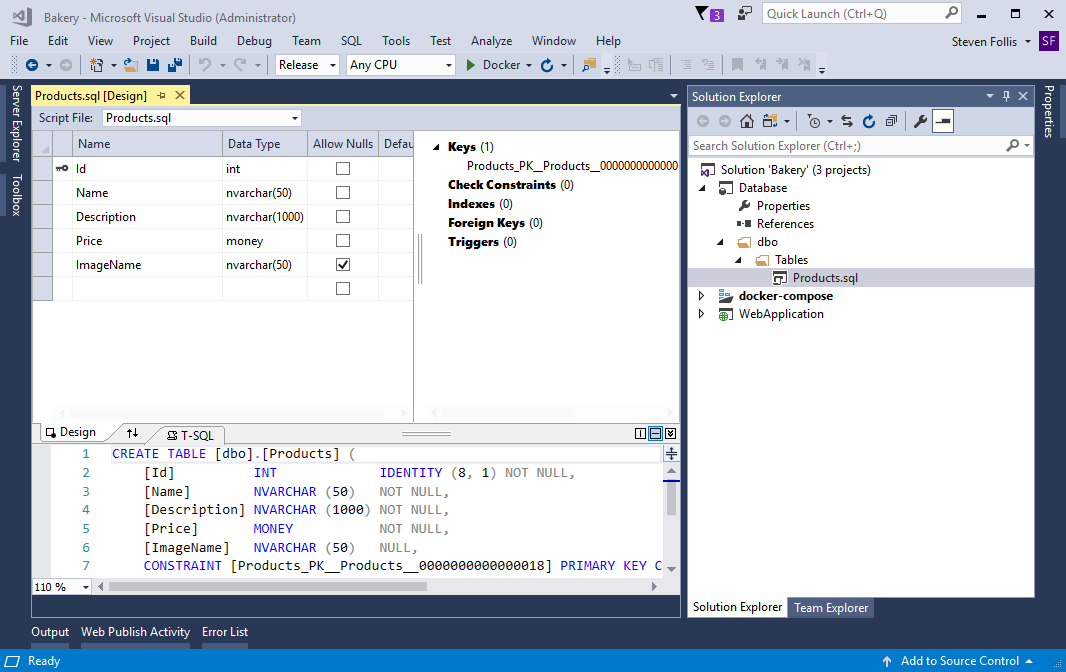
The Database Project now has a folder named dbo. Expand it and open Products.sql. From the Design View we can see the names of each of the columns for the Products table, representing the schema originally setup in the SQL CE file.
Setting up a formal Visual Studio Project for our SQL Database makes updating schemas a straight forward and structured process. To use this schema in a Windows container, we will build the Project into a .dacpac file and import the file into a container.
Create a SQL Server Container
Microsoft maintains a set of Docker Containers for mssql-server-linx, mssql-server-windows-developer, and mssql-server-windows-express, and mssql-server-windows. These are stock images that will require us to add our own database, schema, and data.
The preferred approach for managing and deploying SQL Server databases is a dacpac. This file contains a deployment asset that can be instantiated in a variety of ways, and avoids miles of hand-created script files. One of the benefits of moving our database schema into a Visual Studio Project is the ability to generate a dacpac file via a traditional MSBuild process.
Create a Dockerfile in the Database project. Windows does not like to create files without a file extension (as is customary for Dockerfiles) so one option is to copy/paste from the WebApplication Project into the Database Project. Once your Dockerfile is present, override its contents with the following:
# escape=`

# ================
# Builder Image
# ================
# Downloads dependencies and compiles the SQL Project
FROM microsoft/windowsservercore:10.0.14393.1715 AS builder
SHELL ["powershell", "-Command", "$ErrorActionPreference = 'Stop';"]

# Install Chocolatey for headless installation of MSFT Build tooling
RUN Install-PackageProvider -Name chocolatey -RequiredVersion 2.8.5.130 -Force; `
    Install-Package -Name microsoft-build-tools -RequiredVersion 15.0.26228.0 -Force; `
    Install-Package -Name netfx-4.6.2-devpack -RequiredVersion 4.6.01590.20170129 -Force

# Install Nuget and install Microsoft Data Tools
RUN Install-Package nuget.commandline -RequiredVersion 3.5.0 -Force; `
    & C:\Chocolatey\bin\nuget install Microsoft.Data.Tools.Msbuild -Version 10.0.61708.210

# Add MSBuild to Path for easier usage
ENV MSBUILD_PATH="C:\Program Files (x86)\Microsoft Visual Studio\2017\BuildTools\MSBuild\15.0\Bin"
RUN $env:PATH = $env:MSBUILD_PATH + ';' + $env:PATH; `
    [Environment]::SetEnvironmentVariable('PATH', $env:PATH, [EnvironmentVariableTarget]::Machine)

# Create a folder in the image and copy over VS Project files
WORKDIR C:\src
COPY . .

# Build project
RUN msbuild Database.sqlproj `
      /p:SQLDBExtensionsRefPath="C:\Microsoft.Data.Tools.Msbuild.10.0.61708.210\lib\net46" `
      /p:SqlServerRedistPath="C:\Microsoft.Data.Tools.Msbuild.10.0.61708.210\lib\net46" `
	  /p:Configuration=Release

# ================
# Database Image
# ================
FROM microsoft/mssql-server-windows-express:2017-windowsservercore-10.0.14393.1715
SHELL ["powershell", "-Command", "$ErrorActionPreference = 'Stop';"]

RUN Install-PackageProvider -Name chocolatey -RequiredVersion 2.8.5.130 -Force; `
	Install-Package nuget.commandline -RequiredVersion 3.5.0 -Force; `
    & C:\Chocolatey\bin\nuget install Microsoft.Data.Tools.Msbuild -Version 10.0.61708.210; `
	mkdir C:\database

# Copy built dacpac (from earlier build stage) and configuration scripts
WORKDIR C:\init
COPY --from=builder C:\src\bin\Release\Database.dacpac .
COPY Initialize-Database.ps1 .
COPY SampleData.sql .

# Set startup command to initalize the database
CMD ./Initialize-Database.ps1 -sa_password $env:sa_password -Verbose
This is a far more complex Dockerfile than the Web Application, so let’s break down what’s happening:
-
Two “stages” are being used in our “multi-stage build”. The first is named “builder” and is responsible for building the Database Project into a resulting
.dacpacfile. This stage begins with the Windows Server Core Image, installs several msbuild dependencies from Choclatey and NuGet, copies the source project into the container, and then executes a msbuild on the Project files. -
The second “production” stage starts with a MS SQL Server Express image and deploys the dacpac into a new database. This is done by installing the Microsoft Data Tools necessary for dacpac deployment, copying the
.dacpacfile from the previous stage, and executing the deployment via theInitialize-Database.ps1script file. -
By splitting our build into two stages, we were able to keep the size of our image down. Had we shoved the entire build process into a single stage, the “production” image would have numerous msbuild dependencies that are unnecssary. Using two stages allows us to scrap the intermediary builder files as soon as we have the
.dacpacfile needed for database deployment.
The Dockerfile references a few files that need to be present in our Project for the COPY statements to work. In the Database Project, create a new file for Initialize-Database.ps1 and SampleData.sql, then paste in the contents:
Initialize-Database.ps1:
  # Adapted from Microsoft's SQL Server Express sample:
  # https://github.com/Microsoft/sql-server-samples/blob/master/samples/manage/windows-containers/mssql-server-2016-express-windows/start.ps1
  # And Docker Labs' SQL Server Lab
  # https://github.com/docker/labs/tree/master/windows/sql-server

  param(
      [Parameter(Mandatory=$false)]
      [string]$sa_password)

  # Start the service
  Write-Verbose 'Starting SQL Server'
  Start-Service MSSQL`$SQLEXPRESS

  if ($sa_password -ne "_") {
    Write-Verbose 'Changing SA login credentials'
      $sqlcmd = "ALTER LOGIN sa with password='$sa_password'; ALTER LOGIN sa ENABLE;"
      Invoke-Sqlcmd -Query $sqlcmd -ServerInstance ".\SQLEXPRESS"
  }

  # Attach data files if they exist:
  $mdfPath = 'c:\database\BakeryDB_Primary.mdf'
  if ((Test-Path $mdfPath) -eq $true) {
      $sqlcmd = "CREATE DATABASE BakeryDB ON (FILENAME = N'$mdfPath')"
      $ldfPath = 'c:\database\BakeryDB_Primary.ldf'
      if ((Test-Path $mdfPath) -eq $true) {
          $sqlcmd =  "$sqlcmd, (FILENAME = N'$ldfPath')"
      }
      $sqlcmd = "$sqlcmd FOR ATTACH;"
      Write-Verbose "Invoke-Sqlcmd -Query $($sqlcmd) -ServerInstance '.\SQLEXPRESS'"
      Invoke-Sqlcmd -Query $sqlcmd -ServerInstance ".\SQLEXPRESS"
  }

  # Deploy or upgrade the database:
  $SqlPackagePath = 'C:\Microsoft.Data.Tools.Msbuild.10.0.61708.210\lib\net46\SqlPackage.exe'
  & $SqlPackagePath  `
    /sf:Database.dacpac `
    /a:Script `
    /op:create.sql `
    /p:CommentOutSetVarDeclarations=true `
    /tsn:.\SQLEXPRESS `
    /tdn:BakeryDB `
    /tu:sa `
    /tp:$sa_password

$SqlCmdVars = "DatabaseName=BakeryDB", "DefaultFilePrefix=BakeryDB", "DefaultDataPath=c:\database\", "DefaultLogPath=c:\database\"
Invoke-Sqlcmd -InputFile create.sql -Variable $SqlCmdVars -Verbose
Write-Verbose "Deployed dacpac"

# Insert sample data
Write-Verbose "Inserting Sample Data"
Invoke-Sqlcmd -InputFile .\SampleData.sql -ServerInstance .\SQLEXPRESS

# Relay SQL event logs to Docker
  $lastCheck = (Get-Date).AddSeconds(-2)
  while ($true) {
      Get-EventLog -LogName Application -Source "MSSQL*" -After $lastCheck | Select-Object TimeGenerated, EntryType, Message
      $lastCheck = Get-Date
      Start-Sleep -Seconds 2
  }
SampleData.sql:
  USE [BakeryDB]
  GO

  INSERT INTO [dbo].[Products]
            ([Name]
            ,[Description]
            ,[Price]
            ,[ImageName])
      VALUES
            ('Carrot Cake'
            ,'A scrumptious mini-carrot cake encrusted with sliced almonds'
            ,8.99
            ,'carrot_cake.jpg'),

        ('Lemon Tart'
            ,'A delicious lemon tart with fresh meringue cooked to perfection'
            ,9.99
            ,'lemon_tart.jpg'),

        ('Cupcakes'
            ,'Delectable vanilla and chocolate cupcakes'
            ,5.99
            ,'cupcakes.jpg'),

        ('Bread'
            ,'Fresh baked French-style bread'
            ,1.49
            ,'bread.jpg'),

        ('Pear Tart'
            ,'A glazed pear tart topped with sliced almonds and a dash of cinnamon'
            ,5.99
            ,'pear_tart.jpg'),

        ('Chocolate Cake'
            ,'Rich chocolate frosting cover this chocolate lover’s dream.'
            ,8.99
            ,'chocolate_cake.jpg')
  GO
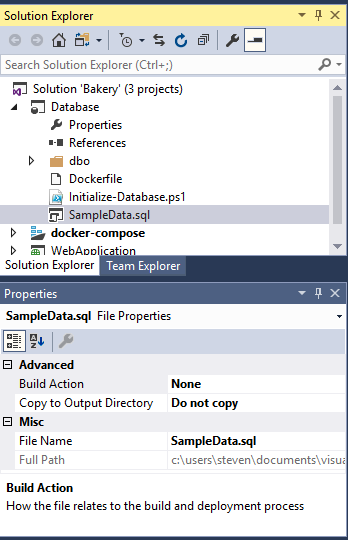
The SampleData.sql needs one additional piece of configuration. Since this is a SQL Project it will try to build the file as part of MSBuild. We are only using it to provide sample data after the .dacpac has been restored, so to disable this default build behavior right click on the file and click Properties. From the Properties window, toggle the Build Action to None.
With out Dockerfile and supporting files created in the VS Project, open a PowerShell window and build the file from the ./Bakery/Database directory.
docker build -t bakery:database .
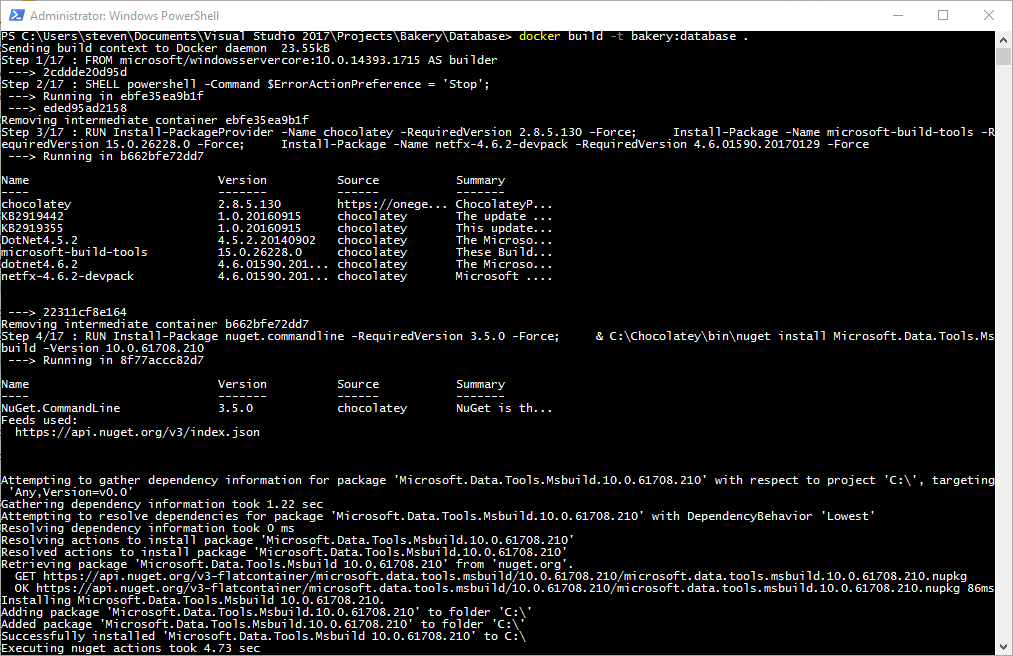
Once the build completes, test the database locally by running
docker run --name dbtest -it --rm -p 1433:1433 -e ACCEPT_EULA=y -e sa_password=Docker123 bakery:database
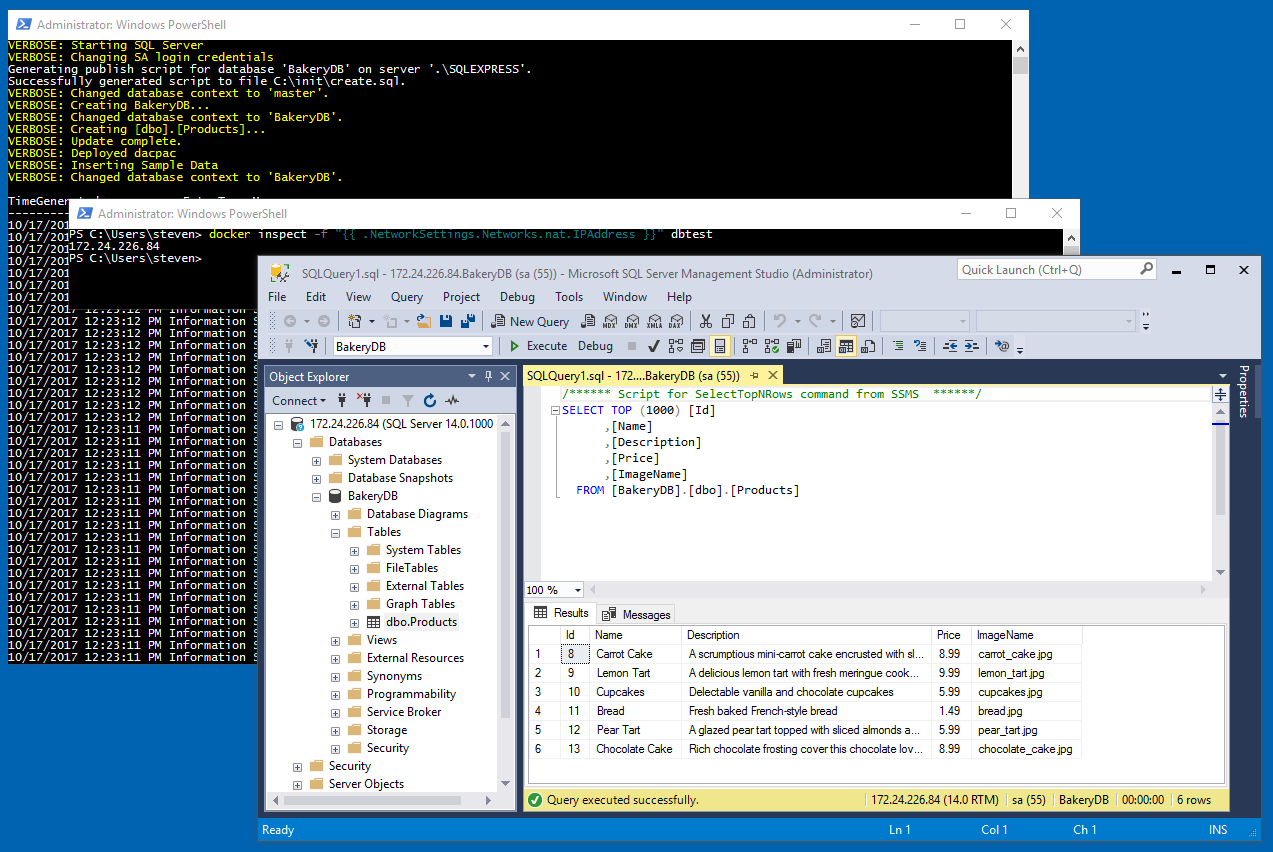
Using docker run with the -it flag runs the container in interactive mode. This allows us to see the output right inline with our terminal. You should see the database initialization script fire up to restore the database and insert sample data per our Dockerfile’s CMD statement. Once the sample data has been inserted, open a second powershell window to get the ip address of the container.
docker inspect -f "{{ .NetworkSettings.Networks.nat.IPAddress }}" dbtest
Plug the IP address into SQL Server Management Studio with username sa and password Docker123 to verify that the BakeryDB and Products table sample data was successfully generated.
We have now created a dedicated SQL Server container complete with a database, products table, and sample data from the original SQL CE content. The final step will be tying the database to the web application.
Part 3: Connecting the Web Application and Database
In Part 1 we containerized a web application, including its App_Data folder holding a SQL CE database. In Part 2 we moved that database to its own dedicated container, but the Web Application is currently unaware of such a momentous activity. To plumb these two steps together, we will update the existing docker-compose.yml file.
Extend Docker Compose
When we last left the humble docker-compose.yml file, we had finished Part 1. Compose files exist to organize multiple application components or tiers into a single deployable unit. We can manage the lifecycle of the Bakery workload with a single file, rather than juggling separate webapplication and database scripts. Since we only had a web application, the yaml file only consisted of 1 defined Service. To extend this file with our database, update the file with an additional database service:
version: '3'

services:
  webapplication:
    image: webapplication
    build:
      context: .\WebApplication
      dockerfile: Dockerfile
    depends_on:
      - database
  database:
    image: database
    build:
      context: .\Database
      dockerfile: Dockerfile
    environment:
      - ACCEPT_EULA=Y
      - sa_password=Docker123
We have also defined a dependency between the webapplication tier and loaded the environment variables that we previously defined during a docker run.
With the web application talking to a separate container, we need to define a Connection String for the client. Opening web.config, paste in the <connectionStrings> block into <configuration>.
<configuration>
  <connectionStrings>
      <add connectionString="Data Source=database,1433;Initial Catalog=BakeryDB;User ID=sa;Password=Docker123" name="bakery" providerName="System.Data.SqlClient" />
  </connectionStrings>
  <system.web>
    <compilation debug="true" targetFramework="4.0" />
    <customErrors mode="Off"/>
  </system.web>
  <system.data>
    <DbProviderFactories>
      <remove invariant="System.Data.SqlServerCe.4.0" />
      <add invariant="System.Data.SqlServerCe.4.0" name="Microsoft® SQL Server® Compact 4.0" description=".NET Framework Data Provider for Microsoft SQL Server Compact" type="System.Data.SqlServerCe.SqlCeProviderFactory, System.Data.SqlServerCe, Version=4.0.0.0, Culture=neutral, PublicKeyToken=89845dcd8080cc91" />
    </DbProviderFactories>
  </system.data>
</configuration>
-
The
namethe same name as the “bakery”.sdffile previously used as the database. By using the same name we can avoid re-coding each of our pages’ SQL queries. -
The
Data Sourceis set todatabase, which is the name of the Service that is defined in thedocker-compose.ymlfile. Docker’s builtin DNS will resolve the database name for us. -
Putting a password directly into the Connection String isn’t optimal, and in a future post we’ll explore the use of Docker Secrets for handling sensitive information.
What’s up, Bakery
With the docker-compose file polished up we can launch both Services with a simple docker-compose up from the root of the VS Solution directory. However, since we’ve been thrashing around with many builds, let’s force a rebuild for the images as the Bakery solution starts up. Feel free to tidy up by removing all running containers and running a docker system prune -f to remove dangling images and volumes.
Note that the VS Tools for Docker setup several compose files, which we can stack with multiple
-fflags.
docker-compose -f .\docker-compose.yml -f .\docker-compose.override.yml up --build --force-recreate

docker inspect -f "{{ .NetworkSettings.Networks.nat.IPAddress }}" bakery_webapplication_1
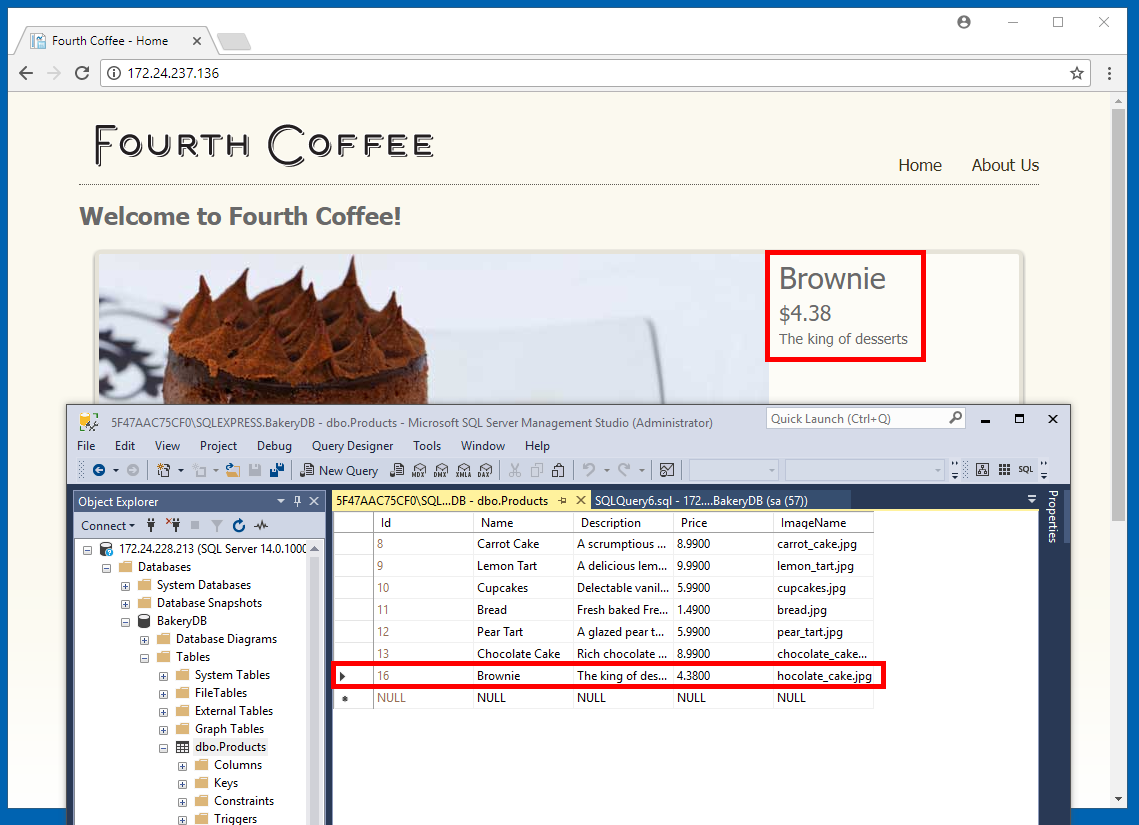
With the IP address from the docker inspect statement, open the running Web Application in a browser tab. At this point we could likely delete the entire .sdf file from the solution, but as a sanity check I grabbed the IP address for the database (also via docker inspect) and used SSMS to add a row called “Brownie”. Refreshing the browser shows the new product alongside its peers as expected.
Wrap Up
Whew! That was fun! We have successfully taken a nearly decade-old application and moved each of its two tiers into a container. In doing so we used multi-stage builds, the Visual Studio Tools for Docker, and Docker Store images from Microsoft. Our Visual Studio solution can now be checked into source control, with a continuous integration system regularly compiling any changes into a new set of images. The portability of such container images allows us to move the application from a legacy Windows Server 2003 or 2008 environment to Windows Server 2016, helping to retire antiquated systems.
For more information, please see the SQL Server Lab on GitHub, which heavily influenced this post.
Thanks!